Today, we’re excited to have Amber from Crazy Little Projects doing a guest post — a bench cushion tutorial — for you guys. She created this project as part of her Sew Crazy Monthly Challenge (February’s theme was Home is Where the Heart Is.) After you’ve read through the tutorial, be sure to head over to Amber’s blog to check out her March challenge focusing on sewing bags of all kinds, including pouches, messenger bags and totes. Take it away Amber!
~~~~~~~~~~~~~~~~~~~~~~~~~~~~~~~~~~~~~~
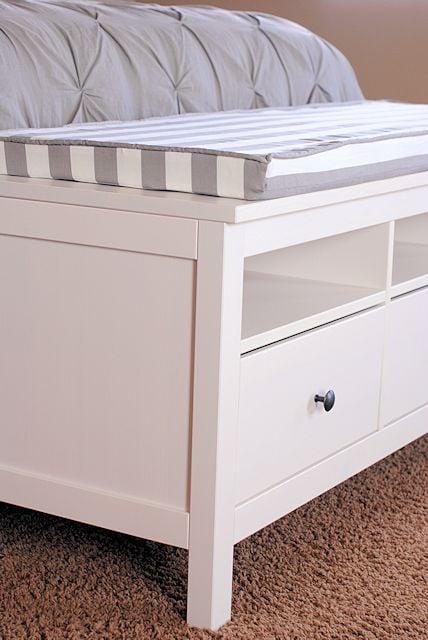
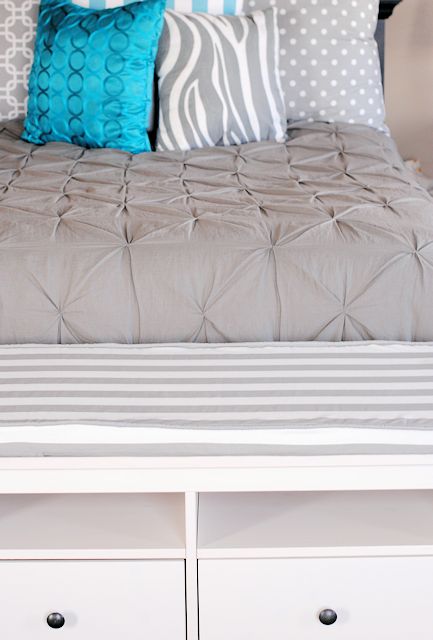
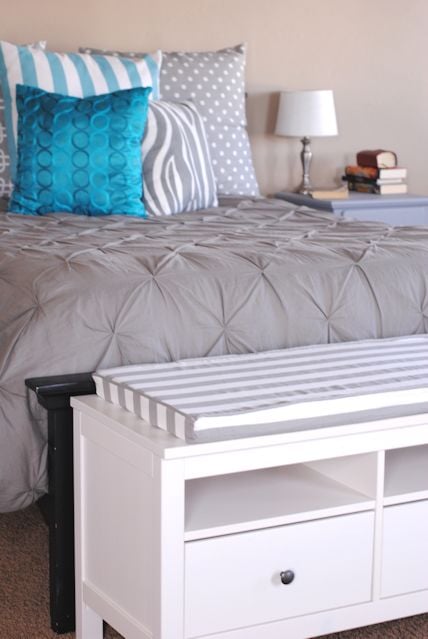
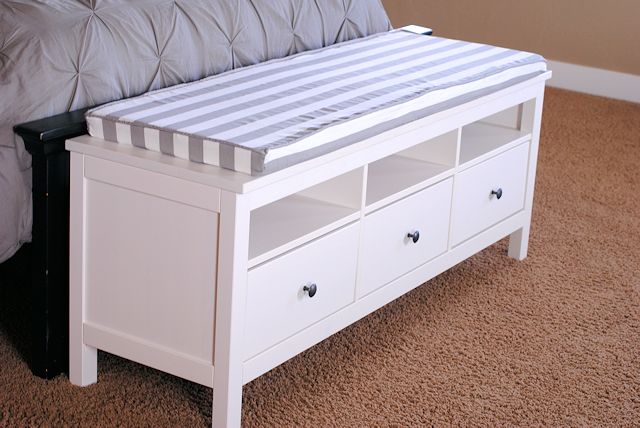
It’s so nice to be here sharing this tutorial with the OnlineFabricStore community! As Abbey mentioned, part of our series last month focused on sewing home decor accents. Using some Premier Prints Canopy Storm Twill fabric I sewed up a cushion to stylishly soften up the bench at the end of my bed:
The thing is — not that long ago my master bedroom was a big gaping hole of undecorated nothingness. And now finally, FINALLY I am getting some projects done in there.
I also added pillows to my bed not that long ago and the fabric for the big ones came from Online Fabric Store as well. So I think the bench at the foot of the bed adds a nice touch:
Got something to make a cushion for too? Let’s talk about how to do it!
Bench Cushion Tutorial:
Supplies Needed:
- Bench (or chair or whatever you need to put a cushion on)
- Piece of foam padding. Measure your bench first to be sure that you get the right size. The foam I got is 2 inches thick and the measurements for the width and the length are almost exactly the right size to fit on the bench so I didn’t have to do any cutting.
- 2 yards of fabric. This of course will vary by the size of your item. My bench is about 54 inches long by 18 inches wide and 2 yards of fabric was just about right for that size. (Keep in mind that the fabric I got was 60 inches wide.)
- 2 or 3 yards of Hook and Loop-I got both the sew in kind and I got loop in the adhesive kind so that I could attach the cushion to the bench with it to prevent it from sliding around.
- Piping on this project is optional-but if you want to do it you will need cording to create your piping (or buy premade piping)
Instructions:
The first and most important part of this is going to be taking careful measurements to be sure that you cut your fabric to JUST the right size.
My cushion is 54 inches long, 18 inches wide and 2 inches deep. I will use those measurements throughout this tutorial, but please adjust your own measurements to fit whatever size piece YOU are working with.
You will need to cut 1 piece for the top of the cushion, 2 pieces for the bottom, and 4 for the sides. Here is how to know what to cut:
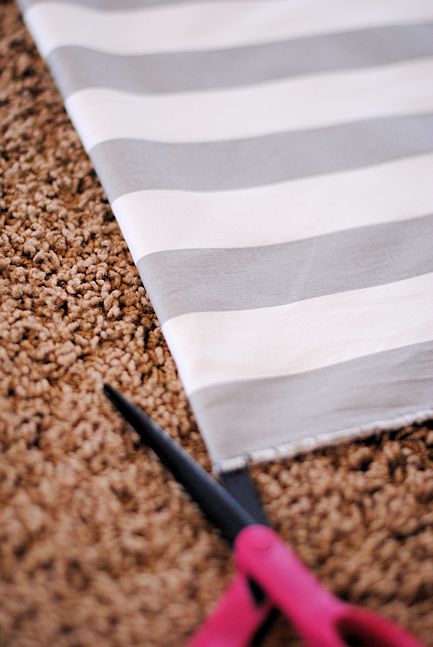
Cutting the Fabric:
Figure out what seam allowance you want to sew with. This is very important for this project. Pick a seam allowance and stick with it. I used a 1/4″ seam allowance.
So for my top piece I needed it to fit a 54×18 inch piece of foam. So I needed to cut it 54 and 1/2″ long and 18 and 1/2″ wide. This gives me the 1/4 inch extra on each edge to allow for my seam allowance but no extra because I don’t want it to be bunchy at all.

For the bottom you need to cut just a little extra to allow for an opening that you will Velcro shut. So add 4 inches to your length (so for me it would be 58 inches). Cut it the same width as the top. Then, cut your bottom piece in half. So now I would have 2 pieces that are 18 by 29 inches.
For the sides you will need to do the same thing. Cut them whatever the
depth of your foam is plus the seam allowance. And whatever length that
side of your foam is, plus the seam allowance. (You can add a little
extra length and cut it off later if you prefer. This can add ease to
the sewing part.) So for my 2 inch thick foam and my 1/4″ seam allowance
I needed to cut mine 2 and 1/2 inches.
If you want to add piping to your bench cushion, create your piping now.
If you need help doing that, here is a tutorial on how to sew piping. Make piping
that will reach all the way around the perimeter of your cushion. Add a
little extra to the length just to me on the safe side-you can always
cut it off later.
Sewing:Now you should have all of your pieces ready to
start sewing. I am going to assume you are adding piping and begin from
there. If you are not, skip these steps.
Take your piping and lay it along the outer edge of your top fabric
piece. Right side of the fabric should be up. Pin the piping in place
like this:
At the corners, carefully turn the piping and let it form a right angle
like this:

Stitch that in place. I used my zipper foot to do this to ensure that I
could get right up close to the piping to do this.
Now, place your side strip fabric along your top edges with right sides
together:
Sew around all 4 edges in 4 long strips. The corners will not be sewn at
this point.
To do the corners turn your fabric so that the right side is up. Fold
the corner together to form a triangle point like this:

Then sew your seam right at that corner where I marked it. Be careful
NOT to get your piping into the seam when you sew this. EXCEPT at the
corner you began and ended the piping at. This will be your opportunity
to hide those ends but sewing it into this seam.
Do this on all 4 corners.
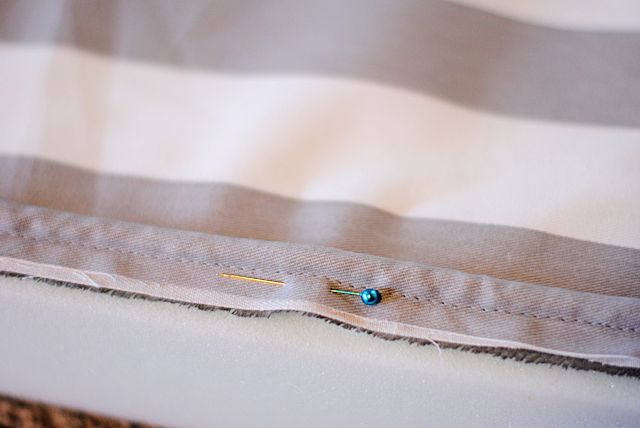
With your bottom pieces-we need to hem them and add hook and loop where
they will meet up. In the spot that you cut this piece in half
originally, hem them under with a 1 inch thick hem. Fold it once, fold
it again and pin it (press as well if you would like):

And stitch.
Add a strip of hook and loop to this hemmed end. One will need to go on
the top of the fabric and one on the bottom so that they meet up:
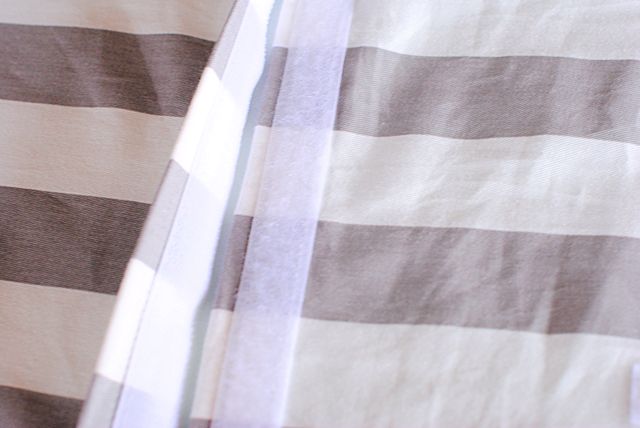
Next, I sewed a few strips of hook and loop (just the hook part though)
onto each piece of the bottom so that I could attach the cushion to the
bench:

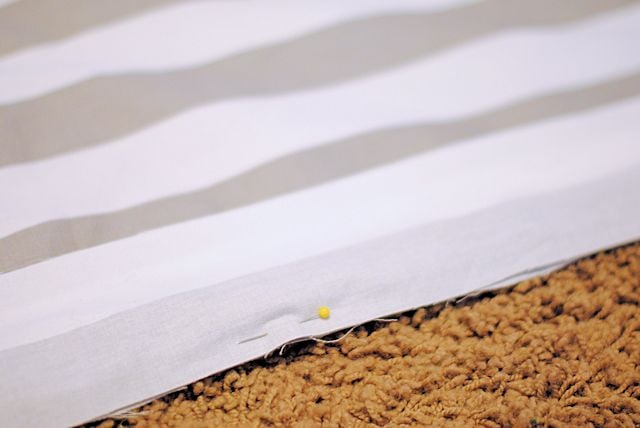
Now, with your sides sewn to your top and your corners done, pin the
bottom all the way around the edges with wrong sides together and sew it
in place. Turn it all right side out.
Slide your foam inside. This will take some serious wrestling to get it
all in place nicely. Be careful not to rip anything.
Then, add some adhesive hook and loop to your bench and attach the
cushion and you’re done!
Now, come over and join me for the Sew Crazy Monthly Challenge!

Thanks so much to Amber for sharing her tutorial!!